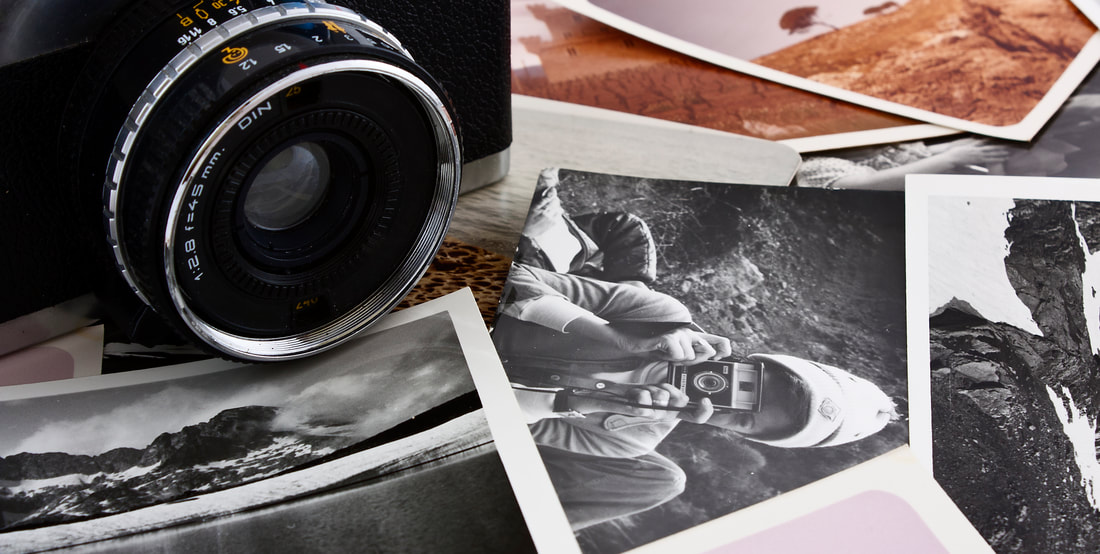
 Do you have boxes, envelopes and totes of old photos? Maybe there are letters and other memorabilia with them -- inherited from your parents or grandparents. Along with the boxes come the questions like what do I do with these, where do I even start?
You are not alone! The overwhelm is real, but you do have options. Scanning the photos, negatives, slides, artwork, memorabilia, etc can be one good option for many reasons. Let’s dive into 10 of those reasons. 1. Scanning - Creates a backup Photos can get torn, scratched, discolored, moldy torn or bent. Those physical photos can last for years if taken care of properly, but a shoebox or a storage tote is not the best place for them. Scanning your photos allows you to have a backup of all the physical items. Giving you another copy and helping to keep them safe. Once digitized you can put the collection on a jump drive or store online. For backup it is recommended that you use the 3-2-1 method. 3 copies, 2 different types (i.e. jump drive or online) and 1 copy offsite. 2. Scanning - Allows you to downsize if you choose Once your collection is digital you then have the choice of what to do with the physical stuff. And it is a choice - there is no right or wrong! If you decide to throw them all away -- that’s ok. You may choose to keep and archive your favorites or give the physical copies to family and/or friends. You may turn your new digital photos into new photobooks. There are lots of options, the best is what is right for you and your situation. 3. Scanning - Allows you to get a good copy before they can deteriorate anymore Every day that our photo collections are stored improperly - in basements, attics or in the old magnetic albums - they run the risk of being damaged. They will begin to deteriorate, discolor and fade. They can become moldy, bent or torn. When they get to this stage it makes it very hard to scan and get a good print. The sooner you take the step of scanning to save them, the better. 4. Scanning - Saves your photo collection from natural disasters As mentioned, scanning gives you a digital backup, so in the event of a natural disaster or just an everyday accident, like an overflowed bathtub, your photos are safe. The physical prints may get damaged, but you have a restored, digital file that you can make a new print from. In the event that you have a disaster that involves water damaged photos - don’t assume all is lost! As part of the Photo Managers we have learned techniques to help you recover as many of those photos as we can. 5. Scanning - Allows you to restore/edit any damaged photos Old photos may be faded, torn, or discolored. Having a digital file will allow you to fix the damage and bring your photo back to life. A digital file can also allow you to make other edits, like cropping, rearranging, adding or removing items from a photo. 6. Scanning - Give you the opportunity to share with family and friends Now that all your files are digital you can easily share them with your family and friends. You can give them a jump drive with all the digital files or you may choose to use an online service that allows you to not only share among groups of people, but also allows you to collaborate. This is also a great time to fill in the stories that go with the photos. You may find yourself sharing a favorite photo with a sibling and before you know it the stories just fly out! Get those written down, you will be glad you did. 7. Scanning - Gives you the opportunity to identify the unknown in your photos In every photo collection you will have photos that you have no idea who or what is in them. Sometimes you can do your own detective work by looking at other photos to figure out time and place, but often you will need help. Here is where sharing with family can help fill in the blanks. Having the collection on an online photo service that allows all members to collaborate can be a good option. Each person can add to the notes or to the metadata of the photos (the who, what, where and when). You can also add your photos to national online services, like ancestry sites and sometimes you get lucky and distant relatives or maybe even someone from that same town will recognize the people and places in the photo. Making the photo digital and sharing it opens up a lot of options 8. Scanning - Allows you to reunite photos collections that may have gotten separated When photo collections get handed down in families they often do not go to one person in their entirety. Many times they are split among several family members. Scanning the collection can make it so that each family member can have their own copy. The physical collection may be in different locations, but you can still allow all members to have the full collection if they choose. Scanning can also allow collections to be shared in situations of family disagreements and/or divorce. Making sure all parties get a copy of the collection if they would like one. 9. Scanning - Makes it easier to sort your collection There are a lot of computer programs that can help you organize your digital photo collection. Depending on how much sorting you did with the physical collection, your first step might be to use a de-duplication software to get rid of duplicates. Then there are programs that can help sort your photos into chronological folders. There is also software that can “tag” people, allowing you to isolate that person and collect all the photos of just that person. At this time you may want to consider adding metadata to your photos. This is adding the who, what, where and when. On old photos you may find some of this information written on the back of the photo or below the photo in an album or scrapbook. Tagging and adding metadata make it easier to find the photos you need when you want to do a photobook or slideshow or just share the photos with a family member. 10. Scanning - Allows you to make all kinds of photos projects and gifts Now that your collection is digital, making photo gifts is easy and prices are very reasonable. To create photo books you can use programs like Apple’s iPhoto or Adobe programs or you can use online vendors like Shutterfly, mPix or Mixbook, just to name a few. In addition, there are other great photo projects to create and share like calendars, canvas or metal prints, puzzles, blankets and slideshows. Having a digital collection allows you to create a project whenever you like. I hope this article has given you some good reasons to scan your photo collection soon. Whether you choose to do-it-yourself or you would like to contact a professional to take on the task, the Photo Managers can help. https://thephotomanagers.com/ If you would to schedule a free consultation you can email me at: [email protected]
0 Comments
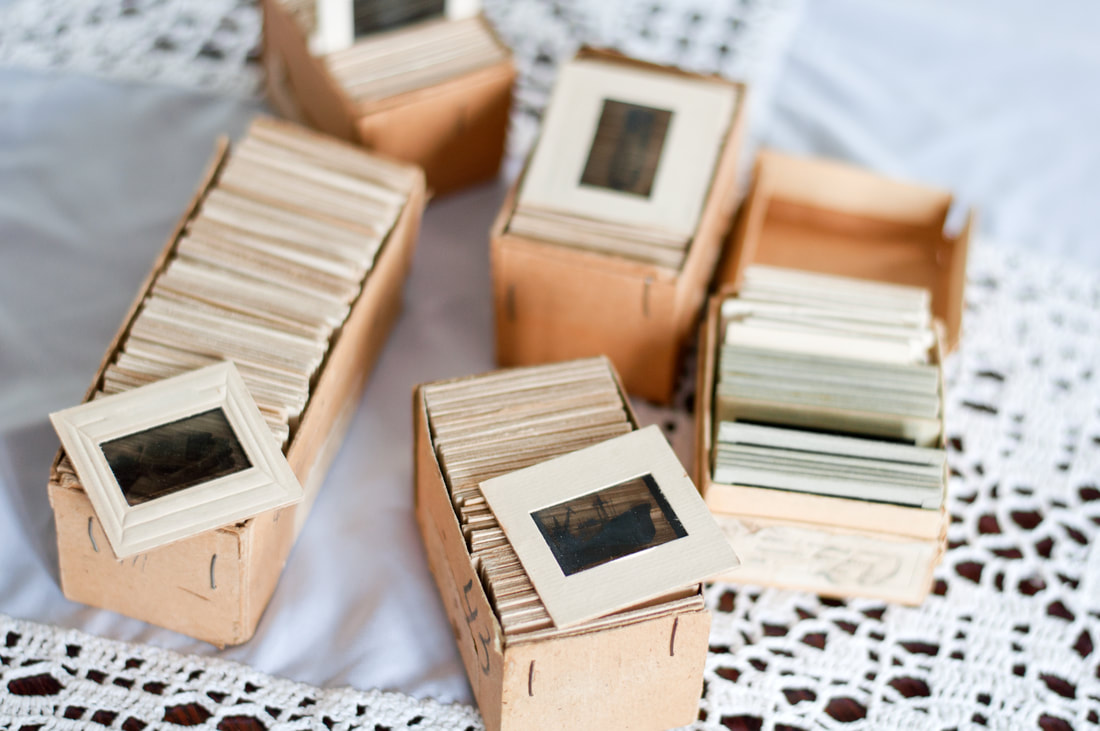 Do you have old slides hidden in a basement or closet that you don’t know what to do with or how to view them. So they just sit there, year after year. You would like to get them scanned, but you’re not even sure what they are of, or if they are decent shots (I am thinking heads cut off).
Well, you can do one of two things: 1) You can scan everything, or 2) You can try sorting through what you have and only scan the best selection. As a professional photo organizer I work with many clients that have to decide what to include in their scanning project, but unlike photos, we don’t usually have a way to view them (unless you have an old slide projector in your basement too)! So here are 3 options to view and sort those slides to send to an organizer to scan or for the DIYourselfer. #1 – Download a Smartphone App Many apps for many things and now Smartphones have a lightbox app and it’s quick and easy to use. There are a number of apps on the market that let you use your phone to see your old slides. A couple apps to check out: - Android (Lightbox Free or White Screen) - Apple (Light Box - Illuminator View or Lightbox Extra) Really just search Lightbox in your app store and there will be several options to choose from. #2 – Use a Loupe If you would rather use something non-techy you can get a loupe (hand lens/magnifying). This can be a great inexpensive way to view your slides. Hold it up to light and it will magnify the slide allowing you to see things better. There is also a loupe made specifically for slides and negatives. Called single slide viewers, they usually cost a little more, but often include a slot to hold the slides in place and a button to turn off/on the background light. #3 – Buy a Lightbox If you have to go through thousands of slides the above 2 options might make you go crazy. A lightbox may be a better option, allowing you to view groups of slides at one time. You can find several options on Amazon. There are Light box light pads, slide and negative viewers or sometimes they are called tracing pads. The lightbox not only allows you to view them, but it can also give you the opportunity to organize them before you scan them, just another step to getting your photo/media collection organized. The goal is to organize, preserve and share! Just think of all the memories trapped on those slides, stuck in the basement. Get ‘em out, take a look, organize and give a professional organizer a call if you need some help! Guthard Creative Designs 402.540.1040 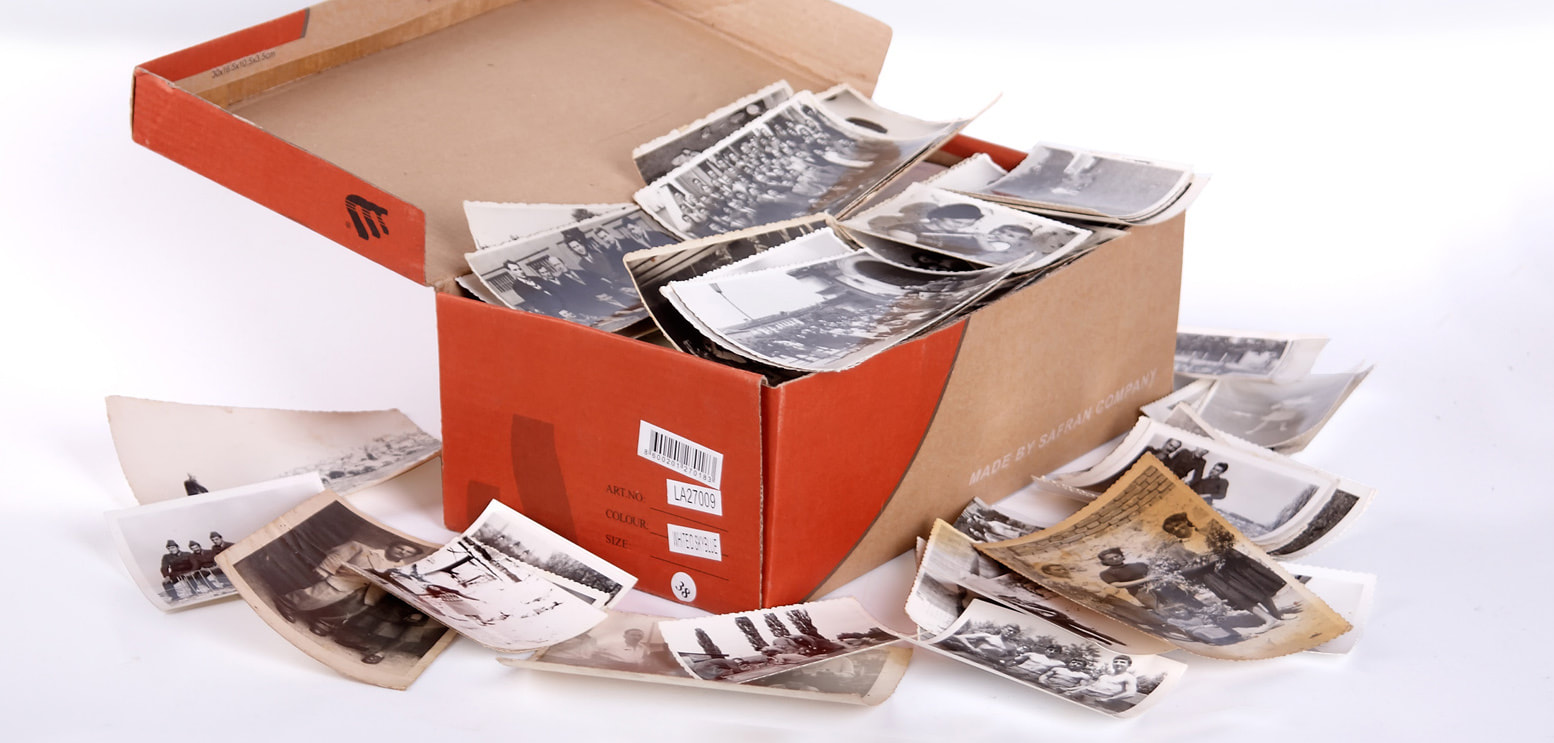 Yeah, it's almost spring! I am so ready for warm weather, flowers and sunshine. With spring also comes that urge to clean and start fresh. If you have always hesitated to start your photo organizing project, I hope this blog gives you some steps to make a fresh start.
Step 1: Gather everything into one location Go on a search, checking all drawers, envelopes, boxes or shelves and bring all the printed photos, albums, frames and memorabilia into a central location that you can dedicate to your organizing space. Step 2: Set up your space, so that it works for you Giving yourself a dedicate space will make it easier for you to stay motivated with your project. Having to drag things out and put them away each time, makes it harder to stay focused. Set up a table for spreading out your photos. If that is not an ideal arrangement for you - don't worry you can still get it done! Get a bunch of empty boxes or bins from the dollar store to sort the photos into. You can then just gather the boxes up after each photo organizing session and tuck them away. Collect some supplies. In addition to the boxes/bins you might need post-it notes, index cards, and a photo safe pen or pencil. Step 3: Start sorting your photos Open up any box, envelope or album and get started. This step is when you are gathering like items together. We are not really focused on eliminating duplicates at this step -- However -- I always note that if you clearly have an envelope of duplicates. You know like when we used to always get doubles, it would be ok at this step to either trash the doubles or put them aside if you think their may be someone else that may like to have the copies. Start grouping the photos by years or decades, or you can sort by eras such as childhood, teenage years, college, etc. Another way to sort could be by theme: birthdays, vacations, sports, holidays, etc. Use the post-it notes or cards to mark your piles of photos and at the end of each session if you need to, put them into the boxes and away. Just having a plan and getting started are the 2 biggest hurdles, before you know if you will have an organized photo collection to share. If you have additional questions or would like more information on how a Professional Photo Organizer can help, shoot me an email. [email protected] follow/like on facebook  For many people, organizing their photos is a daunting task. A task that comes with a list of emotions and a genuine struggle to know where to begin. And that is OK! Take it step by step and you will get there.
Like any big project, one of the first steps of photo organization is to picture the end result. As with any goal, you must have a specific vision and a timeline for completion. Having that end goal will give you direction and incentive to keep going. What is your end goal?
This list shows a few of the goals someone might have for their photos. If you would like help determining your goal, a photo manager can help. For more information you can visit our website at www.guthardcreativedesigns.com To schedule a meeting call 402-540-1040 or email [email protected] As a small business owner are you looking for tools to make your job easier? Check out Canva!3/17/2020  Canva helps you create engaging content and create content consistently -- even if you have little to no graphic design skills. It is an online based graphic design tool that utilizes the drag-and-drop feature to help you create professional layouts.
What can you Create with Canva? Canva offers a variety of content types from social media posts to flyers to process charts, they have templates for them all. If you can’t find the template you are looking for you can create a custom project. Plus, Canva continues to add more content types all the time. How do you design in Canva? Canva offers lots of tools to help you out with your design. They use a drag-and-drop functionality that allows you to add images, text, charts, backgrounds and more. Many of the features of the design area or “canvas” are similar to word processing or other design programs making it easier for you to start designing right away. Features such as changing your typeface, style, color, line spacing and alignment. Can you add photos or graphics? Canva has lot of images to choose from, many of them free and many for just a $1. You can also upload your own photos and graphics to use in your design or grab them from your cloud accounts. Once you choose an image you can apply filters, adjust the tint, brightness and more. Can you share your design or work with team members? Canva allows you to share you designs. Using the share button on the top right of the Canva screen you can: share to edit, share to use as a template or share a link to view. What does Canva cost you? This is the great thing – using Canva is free! Yes, there are items that may cost a minimal fee, such as some images or elements, however there are so many great templates you can use for free. You created something, now what? You created some great Instagram posts or marketing flyers, so now what can you do with them. Canva allows you to download the files to your computer, share a link, upload directly to social media or share to many different cloud locations. These are just a few of the choices. This is just a brief look at what your small business can do with Canva. Learn more about my canva training -- tips and tricks to make you more efficient, as well as graphic design tips to make your designs stand out, 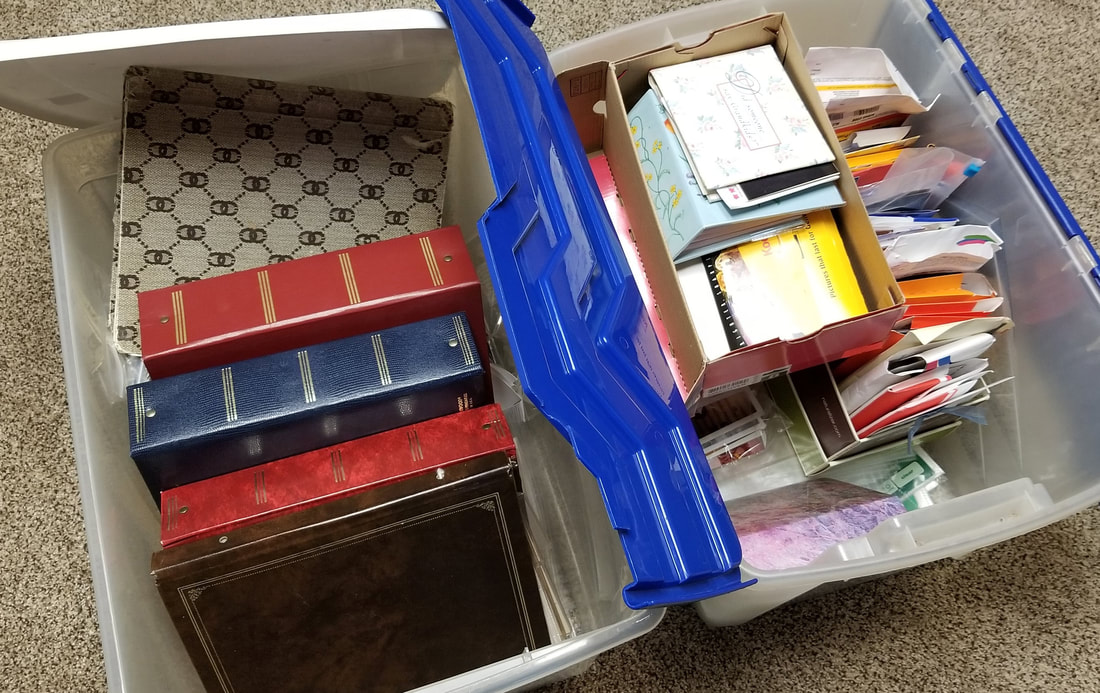
 As small business owners we often wear many, if not ALL the hats of our business, including the marketing hat. It is just not practical, cost efficient or necessary to hire a full-time marketing person, but there are times we all need some help.
When that happens, wouldn’t it be nice to have an expert you can turn to, someone that is part of “your” team when you need them. The help you need may come in the form of graphic design, web updates, social media post, presentation design or brainstorming ideas to help you to come up with the next step. Here are 10 tasks where I can help you as a Marketing Designer
To schedule a consultation about how I can help your small business call 402-540-1040 or email [email protected] |
AuthorTamara Guthard - Photo Manager | Marketing Designer Archives
October 2021
Categories |
 RSS Feed